This is such an exciting post for me to write. My husband and I have just finished building a DIY learning tower. I did not know such a thing existed. Dinner time has been abit of struggle lately. S wants to be picked up to see what I am doing up on the counter. She is always holding on to my legs, pulling my pants lol begging me to pick her up. I always end up cooking with one hand and it just becomes so hard and frustrating for both of us. So one night I thought I should really be looking at how I can involve her in cooking. I googled “toddler helping in the kitchen” and I stumbled across this idea. In fact, this is a Montessori thing. It is designed for your toddler to independently climb up the steps and it is safe. Using this your child is able to help out in the kitchen. So the next day I ordered an Ikea step stool, borrowed a power drill from a friend and on the following weekend we went to the local hardware store and purchased all the materials we needed for our little project.

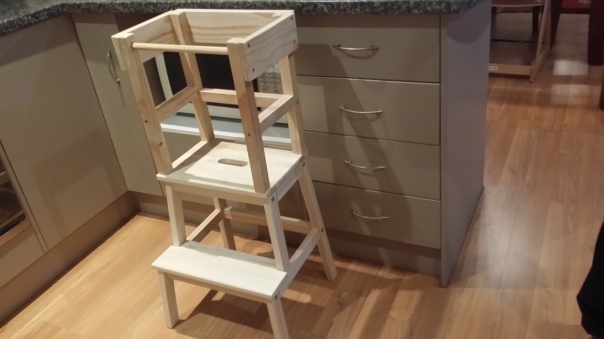
Here are some pictures of how we made the tower. I referred to Darwin’s learning tower as a guide. There were a few hiccups and this project was alot harder than we anticipated but we managed to complete it and the finished job is not bad at all. I love it already. It cost something around $80, not cheap but I’m sure we will get plenty of use out of it and it can be restored to a step stool when S grows out of it.
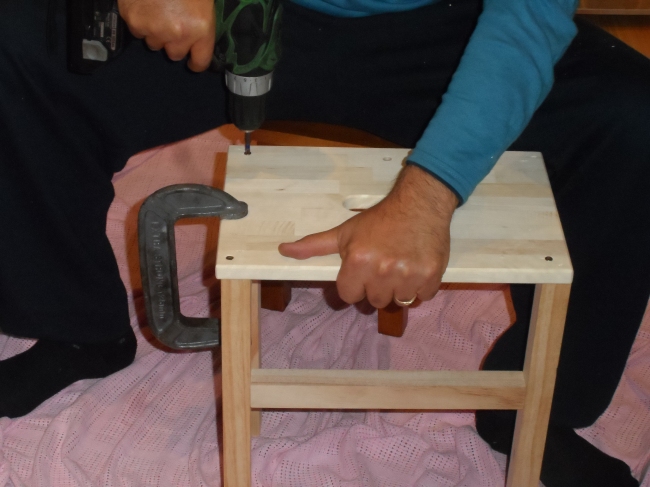
Now here are some handy tips. Please first read the above link a few times carefully, look at the photos below, put the two together and you will have pretty good understanding of how to carry out the task. Then consider the following points that we figured out along the way.

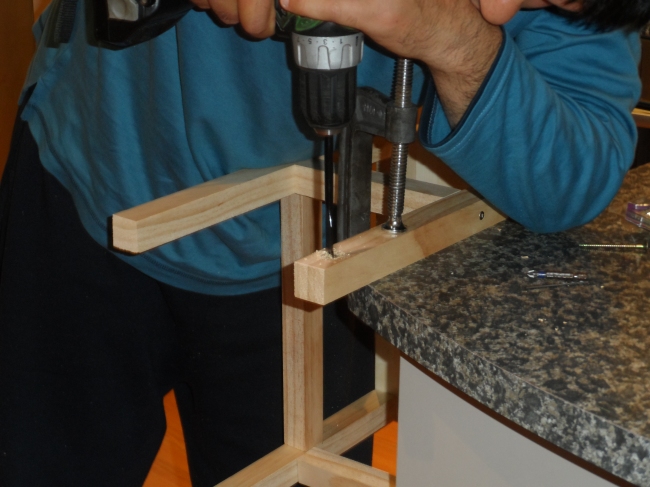


1) do your own measurement because you do not know what type of wood you will be getting at your local store. We got a square prism type 30 by 30mm. I chose square because it made figuring out the measurement easier and I didn’t need to worry which side goes where unlike a rectangular prism. for the side bars we used the same wood, giving it the same look all around.
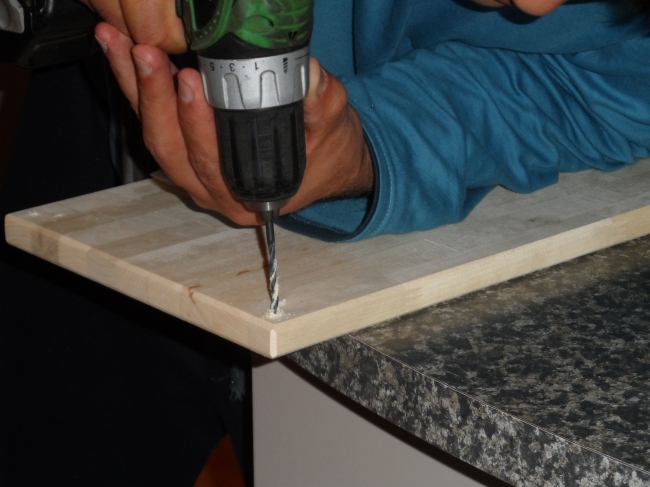
2)We got the hardware store to cut all the timber to the size we wanted and they were so helpful and did not charge us anything (they usually charge $1 per cut) but we got our measurement wrong and ended not getting the exact look we hoped for.
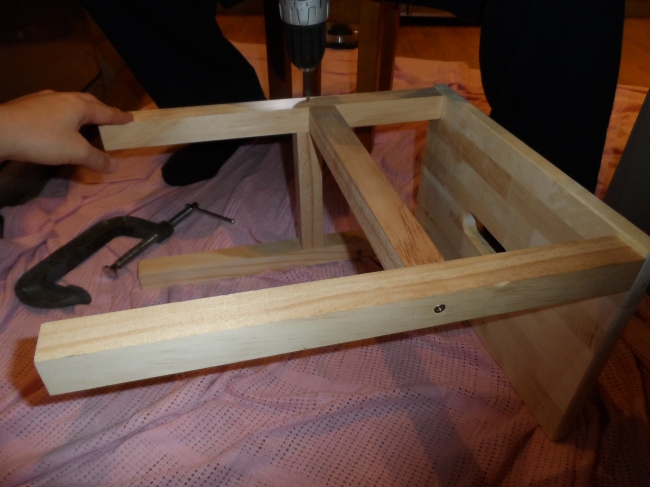
3)Our dowel is 16mm thick, we drilled a whole on each side all the way through. One thing is to make sure the dowel is perfect fit as it could wobble in the hole when your child is holding it to climb up and down.
3) This is very important, make sure your screws are not longer than the thickness of the posts and the side boards combined. Ours were longer and we had to make another trip to the hardware store to get some shorter ones, adding to the cost of the project and alot more hassle.
4)Now where you decide to drill the screws just think about it before you do it, you could easily run into another set of screws that you drilled in before. Just think about the next steps before you do something, making sure you don’t have to undo things.
A big thank you to my darling husband for all the hard work. This is his first DIY task and he certainly made me proud. He doesn’t know I am actually thinking of another project for him to do in the near future, maybe to build a low sink???
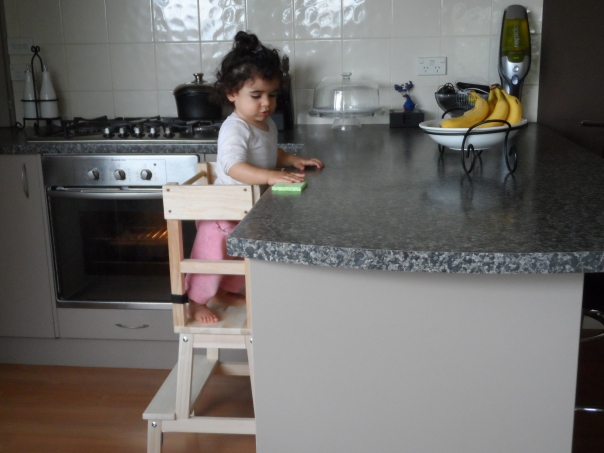
Here S is using her learning tower for the first time, I did some baking and she stood next to me, peeled some mandarins, had them for morning tea, and here she is helping to wipe the bench top while I am tidying up in the kitchen.

It looks great! I’m so glad I could provide some guidance for you guys, I hope little S enjoys it! Darwin still uses his tower every day, although he’s been testing his limits lately, trying to climb up the side railings and onto the counter
Dear Kirstin, thanks alot for your comment. yes your description was very clear and the photos were very helpful in figuring out how to transform a simple stepstool to a learning tower. Thanks alot for sharing it. I can imagine my girl doing the same when she is older 😉
I’m so happy for you! The Learning Tower is such an amazing game-changer in the kitchen. Earlier this spring I posted about Why We Love Our Learning Tower: http://milkweedmontessori.com/2014/03/26/why-we-love-the-learning-tower/
Thank you Mehgan for your comment, yes i had a look at your post earlier, I like how Jasper is happily using his learning tower all day everyday, doing a range of activities 🙂 my little girl is not very comfortable with it yet, she still prefers to be in my arms when I am cooking but I’m sure we will get there one day, I’m not pushing for it at all cause I want her to willingly use it, for now I think I have to stick to what she needs (closeness to me) 🙂
PS. S looks so happy and focused cleaning the counter in that last photo!
I also like how this has provided an opportunity for my husband to be involved in preparing a right learning environment for S. I do almost all of the research and planning and I’m so glad daddy was able to be a part of it. We both enjoyed doing this project together, it looks simple but it actually needed alot of thinking and consideration. Unfortunately, here in this part of the world there was not one single already made learning tower but luckily there are loads of alternative ideas on the web. Right now I’m loving Ikea 😀 Thanks again for stopping by,
Nasim